Alright, just finish the critique 1 at studio just now. Everything is going on smoothly.
As mention before, I still can't test out the infrared calligraphy pen due to the wiimote is not with me. Yet, Mr.Kok Yoong have reply my e-mail and I manage to get it from Mdn.Forest today. Coming day is our school trimester break, I will take this time to start doing the installation's graphic and research more on the action script.
happy working... =)

Thursday, March 31, 2011
Monday, March 28, 2011
FYP2 - Critique 1 - Infrared pen material and progress

Infrared LEDs
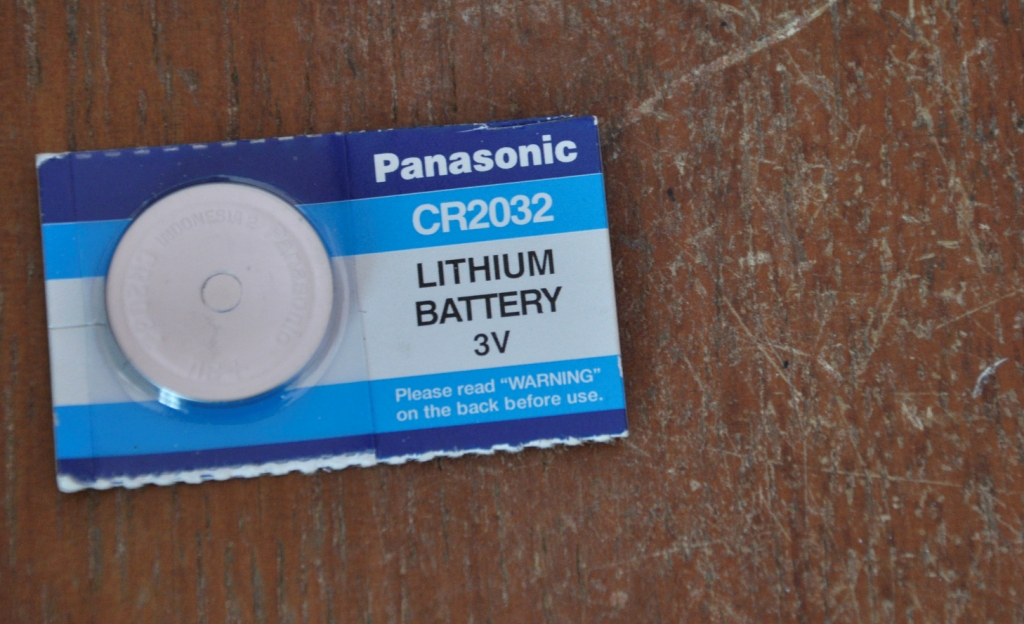
3V Battery

2x 1.5V Battery

Key chain ( For testing purpose )

Cut off the key chain

Open it

Take out the LEDs light with casing

Here the side with the button

When press on it, the LEDs light will on

Here the other side

Take off the LEDs light

The infrared LEDs

Replace the LEDs light to infrared LEDs
Further testing is with wiimote and the software system. The software system is to hack on the wiimote.
 When the wiimote is on, start the WiimotePresenter application and the bluetooth of the computer, then long press on the button on the wiimote to connect it with the computer. (This step still under the pending list as Wiimote is not with me all the time and i can't test on it (But all the material is ready.), will try to get it and test it as soon as possible.)
Thursday, March 24, 2011
FYP2 - Critique 1 - Low-Cost Multi-point Interactive Whiteboards Using the Wiimote
Since the Wiimote can track sources of infrared (IR) light, it can track pens that have an IR led in the tip. By pointing a wiimote at a projection screen or LCD display, can create very low-cost interactive whiteboards or tablet displays. Since the Wiimote can track upto 4 points, up to 4 pens can be used. It also works great with rear-projected displays.
Software
The calibration and mouse cursor emulation software is available for download and try yourself.
1. Connect wiimote to PC via Bluetooth. There are a number of tutorials online on how to do this, possibly even specific software/hardware configuration. The Wiimote works with many (but not all) Bluetooth drivers. Can report/read about compatibility issues at WiimoteProject.com.
2. Download the Wiimote Whiteboard software. Read the "READ ME.txt" file, make sure wiimote is connected via Bluetooth, and then run the ".exe" in the main folder. NOTE : Good placement of the wiimote is key to good tracking. View the README for more info.
Multitouch : The multitouch demos are custom C# DirectX programs. The code is built on top of this Wiimote library. Unfortunately, multi-touch capable applications are currently extremely rare. Hopefully, that will change as more developers explore its potential.
Building pens : The LEDs that use is normal type of LEDs while other LEDs with name/brand or without name/brand also work too. Might be able to jump start the experimentation by retro-fitting a mini keychain light with an IR LED.
Tuesday, March 22, 2011
FYP2 - Critique 1 - Research - Touch Screen with Wii Remote hacks
1. Wii Remote ( Cost around RM100.00 )
2. Projector ( Borrow from labs )
3. Infra Red pens ( Self-made and low cost with around RM10.00 )
5. Laptop is preferable because of mobility
4. Application software
Friday, March 18, 2011


Thursday, March 17, 2011

Monday, March 14, 2011
FYP2 - Critique 1 - Gantt Chart

Before the FYP 2 start, here the progress planning. Hope everything will go smoothly. Happy working~
Subscribe to:
Posts (Atom)