References :
http://www.johnnylee.net/projects/wii/
http://www.wiiphysics.site88.net/
http://www.cycling74.com/forums/topic.php?id=11028
http://sites.google.com/site/jasonlpsmith/wiimotepresenterhelp
http://web.me.com/bremnerr/Haptics_and_Motion_Tracking_in_Education/WiiMote_I.html
http://www.google.com.au/search?hl=en&q=connect+wiimote+PC&meta=
http://www.nintendo.com/consumer/systems/wii/en_na/setupWiiRemote.jsp
http://mkeadle.org/wiiboard/
http://sites.google.com/site/jasonlpsmith/wiimotepresenter

Wednesday, April 20, 2011

FYP2 - Critique 2 - Infrared Testing
This is the wiimote I get from Mdn.Forest.

Creating a light pen
This program is meant to be used with IR light pens that may require custom construction. The pen consists of an infrared (IR) LED and a momentary push-button on switch such that the LED illuminates only while the button is pressed. This light pen will effectively act as your mouse pointer and the button will act as your left-click. Some website sell IR keychain lights which may work right out of the box for this application.
Using this program with any other type of IR source may result in unpredictable or undesirable results.
You may be able to retro-fit an LED keychain with an IR LED to get something working quickly. You can also try using a typical IR remote control. HOWEVER, remote controls often flash the LED which will manifest itself as a lot of rapid clicking. This may cause undesirable results.
I have modify the IR LED into the key chain I mention before and tight it with the calligraphy pen.
As this just a testing with the wiimote. Hope it will successful.


This program is meant to be used with IR light pens that may require custom construction. The pen consists of an infrared (IR) LED and a momentary push-button on switch such that the LED illuminates only while the button is pressed. This light pen will effectively act as your mouse pointer and the button will act as your left-click. Some website sell IR keychain lights which may work right out of the box for this application.
Using this program with any other type of IR source may result in unpredictable or undesirable results.
You may be able to retro-fit an LED keychain with an IR LED to get something working quickly. You can also try using a typical IR remote control. HOWEVER, remote controls often flash the LED which will manifest itself as a lot of rapid clicking. This may cause undesirable results.
I have modify the IR LED into the key chain I mention before and tight it with the calligraphy pen.
As this just a testing with the wiimote. Hope it will successful.
After the combination, I have do some online research and download software to hack in the wiimote.

The bluetooth devices. (Buy two different type to test)
How to use
1. You MUST first connect your wiimote to your PC via bluetooth before running the program. You can follow this tutorial using the Blue Soleil Windows Driver: http://www.wiili.org/index.php/How_To:_BlueSoleil
Some users have reported this working with other bluetooth drivers. But, I have not tested it.
2. Launch "WiimoteWhiteboard.exe" in the root directly of the archive. NOTE: ANY visible IR source will trigger mouse events and manipulate your computer. Any unintentional IR sources may result in undesired behavior. BE CAREFUL where you point the wiimote.
3. Click the button "Calibrate Location" or press the A button on the wiimote to begin touch calibration. Use your IR light pen to touch each crosshair and activate the LED (as if pressing your mouse button to click). After 4 points are calibrated, the touch screen should be ready to use.
Recalibration (and auto-loading last calibration)
To recalibrate, simply press the calibration button again (note the light pen stylus may not work yet if the calibration was poor) or press your wiimote A button. When the program is launched, it will reload the last calibration. If your wiimote and display configuration has not changed, re-calibration may not be necessary.
Controls
1. Pressing the A button on the wiimote will activate the calibration once the whiteboard application is running. If the calibration is already running, this will restart the calibration with the 1st point.
2. Pressing the esc will exit the calibration screen.
3. "Cursor Control" will enable or disable mouse control of the stylus
TROUBLE SHOOTING
"The application failed to initialize properly (0xc0000135)" - You need Microsoft .NET 2.0 installed. You can download this from Microsoft's website.
"The program says it can't find the wiimote" - Check that you have gotten the
wiimote already connected via bluetooth. The WiimoteWhiteboard program does not do this for you. Follow the instructions at: http://www.wiili.org/index.php/How_To:_BlueSoleil
Some users have said it works with other bluetooth drivers. But, I have not tested it. Some additional help may be found on the Sourceforge Project page: https://sourceforge.net/projects/wiiwhiteboard/
"Nothing happens when I activate my light pen on the crosshair" - this can be caused by a variety of problems:
1 .Verify that your light pen is working (many camera phones are sensitive to IR light, point your camera phone at your pen tip and press the button).
2. Make sure the wiimote can't see a stray IR light source. When the dialog box is open the region next to "Visible IR dots:" should be blank when not using your light pens. If there is a number there, that means the wiimote can see something which will interfere with tracking. Numbers should only appear when you activate your light pen in front of the wiimote.
3. Make sure the wiimote can see your pen - using the "Visible IR dots:" diagnostic, you can tell if the wiimote sees your pen. Begin by pointing the pen near the front the wiimote. You should see numbers appear if things are working properly. As you move toward your screen the numbers should still appear/respond to your light pen. If the numbers stop appearing, either:
a) Your light pen has left the field of view of the wiimote and you will have to reposition it to see your whole screen, Positing the wiimote further away may help.
b) The wiimote's view of the pen has been block by another object or your body. You must be conscious of the position of your body/hands as to not block the view of the wiimote. If you are fortunate enough to make a rear-projected screen or table, blocking the wiimote will become a non-issue.
c) Your light pen is not bright enough. This may be because the LED is not receiving enough power. This may require fixing the power supply (change batteries) or may require modifying the electrical circuit (more power, smaller resistor if you have one) or choosing a brighter LED.
"My lines are really squiggly and accuracy is bad" - Remember the Wii Remote contains a camera, and the better view the camera has of your screen the better tracking you'll have. So, good placement is the key to good tracking. The more direct view the wiimote has of your screen, the better, The closer it is without losing visibility of your screen, the better. The wiimote camera is 1024x768. So, using it with screen resolutions significantly higher than 1024x768 may result in difficulty clicking on small objects.
The wiimote camera has a 45 degree field of view. Keep this in mind for placement. Using the "Visible IR dots" diagnostic on in the software, you can test the visibility of the corners of your screen using your IR pen. It may be helpful to turn off cursor control for this. Activate the LED at each corner location and check if the Wiimote still sees it. Some squiggilyness is unavoidable, but it can definitely be minimized. Smoothing is on the feature list to be added in any future release. If you are fortunate enough to make a rear-projected screen or table, the wii-remote can get a direct view of the screen giving you high-tracking quality without the trade off of blocking the camera.
But sadly, my testing fail couple of time as I can't connect the wiimote into my PC. The pop up message state as below, yet I have try different types of bluetooth device. = (

"My lines are really squiggly and accuracy is bad" - Remember the Wii Remote contains a camera, and the better view the camera has of your screen the better tracking you'll have. So, good placement is the key to good tracking. The more direct view the wiimote has of your screen, the better, The closer it is without losing visibility of your screen, the better. The wiimote camera is 1024x768. So, using it with screen resolutions significantly higher than 1024x768 may result in difficulty clicking on small objects.
The wiimote camera has a 45 degree field of view. Keep this in mind for placement. Using the "Visible IR dots" diagnostic on in the software, you can test the visibility of the corners of your screen using your IR pen. It may be helpful to turn off cursor control for this. Activate the LED at each corner location and check if the Wiimote still sees it. Some squiggilyness is unavoidable, but it can definitely be minimized. Smoothing is on the feature list to be added in any future release. If you are fortunate enough to make a rear-projected screen or table, the wii-remote can get a direct view of the screen giving you high-tracking quality without the trade off of blocking the camera.
But sadly, my testing fail couple of time as I can't connect the wiimote into my PC. The pop up message state as below, yet I have try different types of bluetooth device. = (

Saturday, April 16, 2011
FYP2 - Critique 2 - Sound
I have use my own recording device to record the sound I wish to put into the installation. The below is the sound be selected.


Create a playlist at MixPod.com
Tuesday, April 12, 2011
FYP2 - Critique 2 - Coding
The software i use is Adobe Flash while here some action script2 that I found and tested many time until it successful.
To write on the text, stroke will be written :
_root.createEmptyMovieClip("line", _root.getNextHighestDepth());
line.lineStyle(25, 0x000000, 100);
var drawing = false;
this.onMouseDown = function(){
drawing = true;
}
this.onMouseUp = function(){
drawing = false;
}
this.onEnterFrame= function(){
if(drawing == false){
this.line.moveTo(_xmouse,_ymouse)
}
if(drawing){
this.line.lineTo(_xmouse,_ymouse)
}
}
When user write on the text, sound will be play :
on (press) {
if (playing!=true) {
_root.sixSound.stop();
_root.fifthSound.start(0.1,999);
_root.line.lineStyle(25, 0x000000, 100);
playing=true;
}
}
on (release, rollOut, dragOut) {
if (playing==true) {
_root.fifthSound.stop();
_root.sixSound.start(0.1,999);
playing=false;
}
}
on(dragOut){
_root.sixSound.start(0.1,999);
}
on(release, releaseOutside){
_root.sixSound.stop();
}
When user write out off the text, noise will out:
on (press) {
if (playing!=true) {
_root.secondSound.start(0.1,999);
playing=true;
}
}
on (release, rollOut, dragOut) {
if (playing==true) {
_root.secondSound.stop();
playing=false;
}
}
To define the sound :
firstSound = new Sound();
firstSound.attachSound("water_sound.mp3");
secondSound = new Sound();
secondSound.attachSound("water_noise.mp3");
thirdSound = new Sound();
thirdSound.attachSound("bird_sound.mp3");
forthSound = new Sound();
forthSound.attachSound("bird_noise.mp3");
fifthSound = new Sound();
fifthSound.attachSound("wind_sound.mp3");
sixSound = new Sound();
sixSound.attachSound("wind_noise.mp3");
To clean the writing :
line.clear();
line.lineStyle(25, 0x000000, 100);
To write on the text, stroke will be written :
_root.createEmptyMovieClip("line", _root.getNextHighestDepth());
line.lineStyle(25, 0x000000, 100);
var drawing = false;
this.onMouseDown = function(){
drawing = true;
}
this.onMouseUp = function(){
drawing = false;
}
this.onEnterFrame= function(){
if(drawing == false){
this.line.moveTo(_xmouse,_ymouse)
}
if(drawing){
this.line.lineTo(_xmouse,_ymouse)
}
}
When user write on the text, sound will be play :
on (press) {
if (playing!=true) {
_root.sixSound.stop();
_root.fifthSound.start(0.1,999);
_root.line.lineStyle(25, 0x000000, 100);
playing=true;
}
}
on (release, rollOut, dragOut) {
if (playing==true) {
_root.fifthSound.stop();
_root.sixSound.start(0.1,999);
playing=false;
}
}
on(dragOut){
_root.sixSound.start(0.1,999);
}
on(release, releaseOutside){
_root.sixSound.stop();
}
When user write out off the text, noise will out:
on (press) {
if (playing!=true) {
_root.secondSound.start(0.1,999);
playing=true;
}
}
on (release, rollOut, dragOut) {
if (playing==true) {
_root.secondSound.stop();
playing=false;
}
}
To define the sound :
firstSound = new Sound();
firstSound.attachSound("water_sound.mp3");
secondSound = new Sound();
secondSound.attachSound("water_noise.mp3");
thirdSound = new Sound();
thirdSound.attachSound("bird_sound.mp3");
forthSound = new Sound();
forthSound.attachSound("bird_noise.mp3");
fifthSound = new Sound();
fifthSound.attachSound("wind_sound.mp3");
sixSound = new Sound();
sixSound.attachSound("wind_noise.mp3");
To clean the writing :
line.clear();
line.lineStyle(25, 0x000000, 100);
Thursday, April 7, 2011
FYP2 - Critique 2 - Interface Design
In this installation, there three text been selected from my mind (The sound of those text more easier to be find and recognize). Due to the installation is focusing on the text writing and its relationship between the sound, the background had been designed simple, plain and clean to avoid grabbing the attention.
After adding in the background image, the below is the final interface design :
The application will start with an intro.


Following with the intruction.


Then the main scene with the text.

 Second text - Bird 鸟.
 Third text - Wind 风.
End is the quit.

After adding in the background image, the below is the final interface design :
The application will start with an intro.


Following with the intruction.


Then the main scene with the text.

First text - Water 水.


End is the quit.

Thursday, March 31, 2011
FYP2 - Critique 1
Alright, just finish the critique 1 at studio just now. Everything is going on smoothly.
As mention before, I still can't test out the infrared calligraphy pen due to the wiimote is not with me. Yet, Mr.Kok Yoong have reply my e-mail and I manage to get it from Mdn.Forest today. Coming day is our school trimester break, I will take this time to start doing the installation's graphic and research more on the action script.
happy working... =)
As mention before, I still can't test out the infrared calligraphy pen due to the wiimote is not with me. Yet, Mr.Kok Yoong have reply my e-mail and I manage to get it from Mdn.Forest today. Coming day is our school trimester break, I will take this time to start doing the installation's graphic and research more on the action script.
happy working... =)
Monday, March 28, 2011
FYP2 - Critique 1 - Infrared pen material and progress

Infrared LEDs
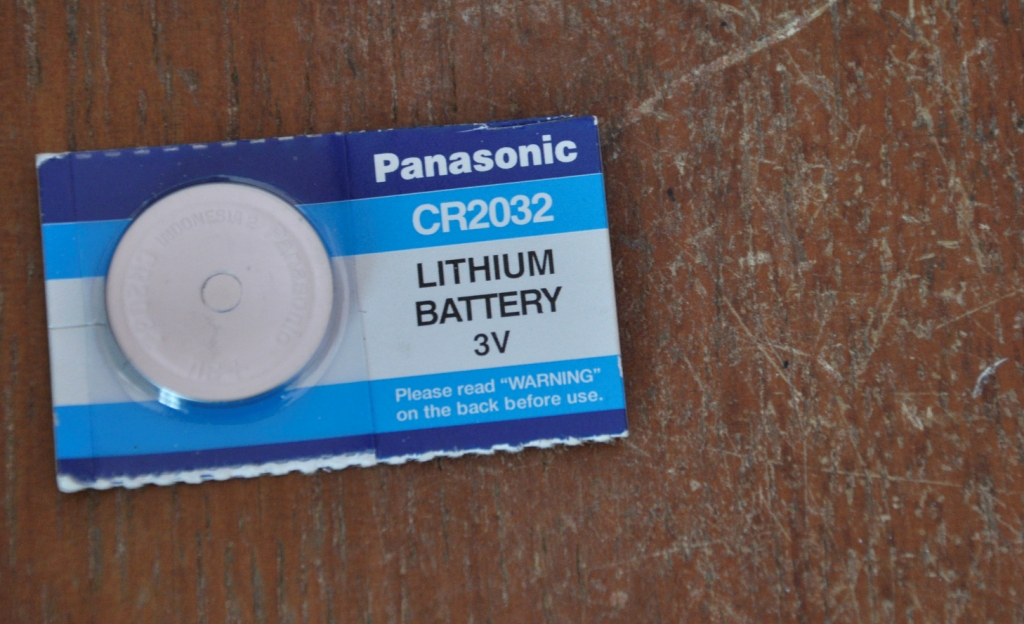
3V Battery

2x 1.5V Battery

Key chain ( For testing purpose )

Cut off the key chain

Open it

Take out the LEDs light with casing

Here the side with the button

When press on it, the LEDs light will on

Here the other side

Take off the LEDs light

The infrared LEDs

Replace the LEDs light to infrared LEDs
Further testing is with wiimote and the software system. The software system is to hack on the wiimote.
 When the wiimote is on, start the WiimotePresenter application and the bluetooth of the computer, then long press on the button on the wiimote to connect it with the computer. (This step still under the pending list as Wiimote is not with me all the time and i can't test on it (But all the material is ready.), will try to get it and test it as soon as possible.)
Subscribe to:
Posts (Atom)